Bird Photography Tutorial 7: Basic Field Techniques
In this tutorial, we'll cover the basics of getting out in the field with your camera, looking at where and when to shoot, who to shoot with, and various aspects of how to shoot, including getting close to birds, getting sharp photos, using the light and capturing the defining moment.
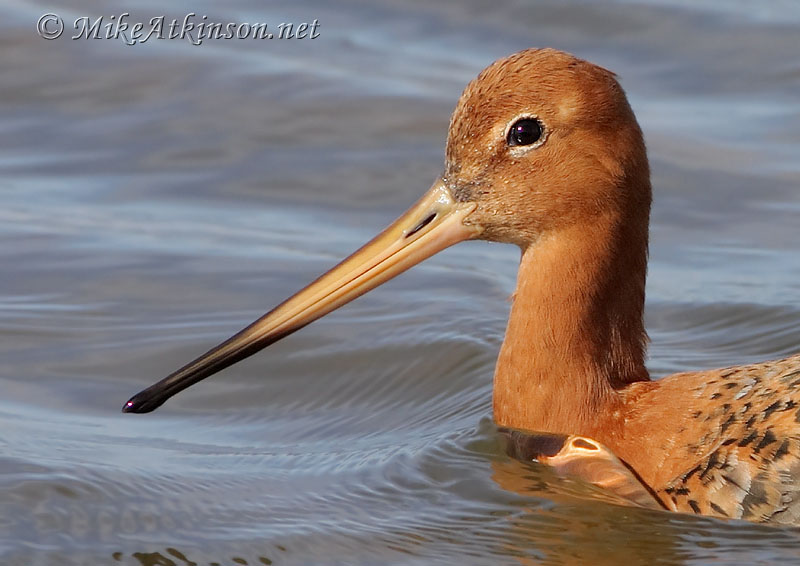
Field techniques Following a few basic techniques will get you close to the right birds at the right time, and enable you to make the most of them. (Black-tailed Godwit in stunning spring plumage.)
In Tutorial 2: Getting Started, I suggested you first of all get some practice on 'soft targets', until you could get sharp, well-exposed images with a decent composition. These targets include birds at bird tables, in parks, zoos and private collections.
In truth, you can get so much satisfaction from this type of bird photography that some photographers never venture further afield. For many, though, there is a lure towards photographing wild birds in their natural environment. There is no right and wrong here, despite what some people say (especially those in the latter camp, who often denigrate photography of captive birds, or even baited birds such as bird-table visitors). Personally, I'm happy doing either, and I don't subscribe to the view that you need to spend days on end in an uncomfortable one-man hide to take worthy photos.
Where to shoot
There are many factors that affect the suitability of a location for bird photography.
Subject matter: There's no point taking your camera gear to a location that has few birds. For example, there are areas of farmland near my home that only rarely contain anything but a few crows. Importantly, though, you also need to be able to get close to the birds that are found there. This rules out many nature reserves which, although rich in birds, prevent you from getting within 100 metres of them to avoid disturbance (and rightly so!).
Photography-friendly: Many locations that are good for watching birds are very poor for photographing birds. At one of my local nature reserves, for example, the bird hide (blind) faces towards the sun, has windows that are too narrow to photograph through and bird feeders that are too close for focusing. Other reserves have hides with fixed glass or plastic windows (often scratched and dirty) that are no use for photography. You need to be able to move freely with your camera to make the most of the birds, the light and the available settings, e.g. foregrounds and backgrounds.
Proximity: This is particularly important if the amount of time you have available for bird photography is limited. On a given day, the less time you have to spend travelling to and from a location, the more time you can spend shooting. Also, the more time you spend at a location, the more you will come to know what birds are there and when, and how to get the best photos of them. Finally, it's easy to visit locations close to home when you can see that the weather conditions are just right.
Access: Ideally, as well as being easy to get to, a location will enable you to enter in your car, possibly to use as a hide, but as a minimum to avoid you having to carry your equipment too far.
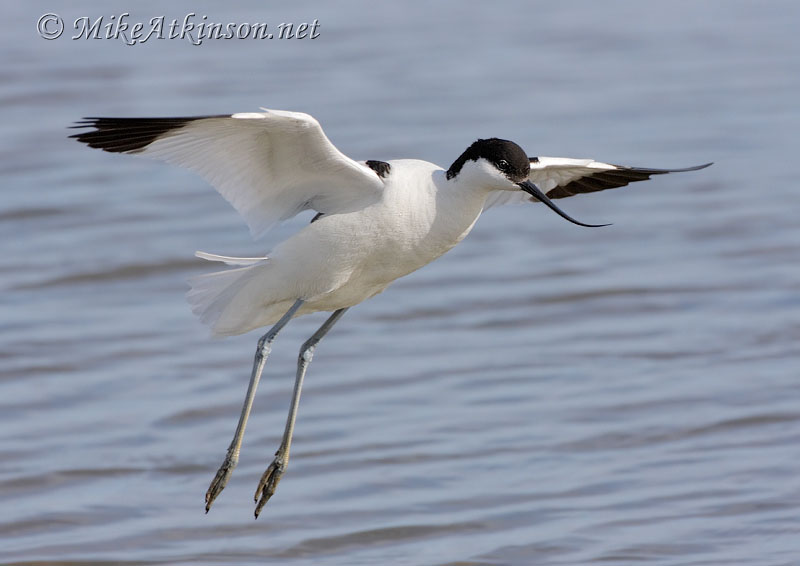
Where to shoot Photographer-friendly reserves such as Marshside RSPB can get you close to some great birds such as this Avocet.
When to shoot
Having found some suitable locations, you can concentrate on timing your visits. Again, there are several factors to consider, including:
Time of year: This has a big effect on what birds are around, what condition they're in and how approachable they are. This can also affect the location itself, such as access (some locations are too wet to access in winter), visibility (some locations have obscuring vegetation in summer) or aesthetics (some locations have the best backgrounds at certain times of the year).
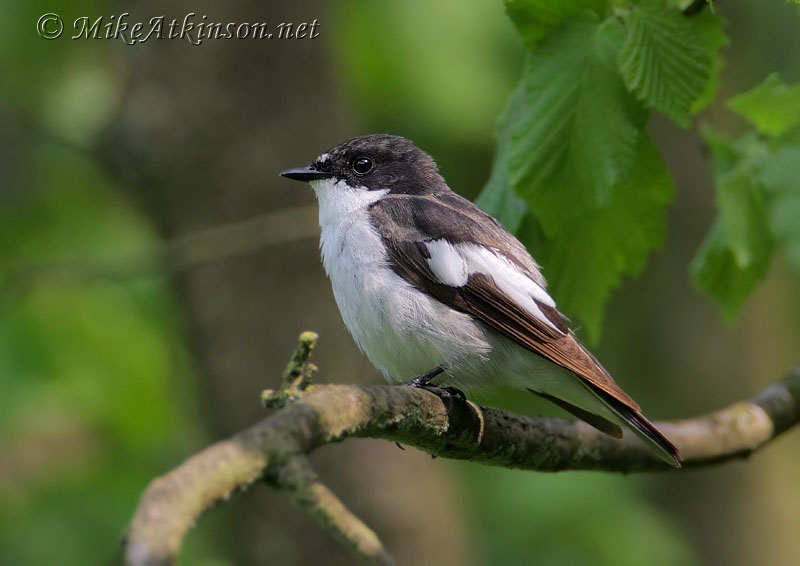
Time of year Pied Flycatchers spend only a small part of the year in the UK and much of that time is spent high in the treetops, once their young have fledged. To photograph these gorgeous little birds, you therefore need to go after them during a small time window around May.
Time of day: This also has many different effects. Firstly, birds tend to be at their most active at either end of the day, and can often disappear during the middle of the day. Second, the light quality can vary hugely through the course of a day, with soft, warm light in the morning and evening, and harsh, overhead light through the middle of the day. Third, the direction of the light changes completely through the course of the day, which may make photography suitable only, say, in the evening at some locations. Finally, human activity also varies during the day, e.g. some locations are only suitable first thing in the morning before the noisy crowds arrive.
Time of tides: Tides are critical when shooting at some coastal locations. At one of my regular spots, low tide is poor because, although there are many birds feeding on the mudflats, they are too dispersed and distant to photograph. As the tide rises, the waders and wildfowl are pushed closer to the shore and shooting opportunities improve. At high tide, though, the mudflats are completely submerged and there are no safe roosts, so the birds move on further down the coast and disappear completely. At some locations, very high spring tides can create special conditions, such as causing rodents in normally unflooded areas to flee the rising tides, providing a feast for assembled birds of prey.
Weather: In very hot, cold or wet conditions, birds can disappear, leaving you with nothing to photograph. Wet and windy days can leave some birds looking very bedraggled, which doesn't make for good photographs. Rain and wind can also make life difficult for you as a photographer. In wet conditions, it can be hard to keep rain off your gear, whilst windy days by the sea can cause corrosive salt spray to be deposited all over your lens and camera body. A particular challenge of windy days is how to keep your gear still enough to get sharp pictures, especially when hand-holding a long telephoto lens. Apart from the obvious measures of finding shelter, using camera support, keeping low, using high ISO/wide aperture/fast shutter speed, etc., it can sometimes be useful to remove your lens hood under these conditions, especially if the sun is behind you. From a photography viewpoint, then, it's easier to shoot under calm, mild conditions but, as you will be aware, many interesting birds will only be seen under harsher conditions (e.g. seabirds or vagrants blown in by prolonged onshore winds).
Time of day Where possible, get up early to catch the soft light of dawn or wait for the warm tones of sunset. This Common Tern was photographed at the exact time the sun was dipping below the horizon.
Who to shoot with
This may seem a strange topic to include, but there are a few considerations here.
When you're starting out, it can be a big advantage to be able to join an experienced bird photographer. This can help you find good locations and subjects, and can enable you to learn by imitation, as well as to get some coaching in real time. However, this is likely to be a hindrance to the experienced photographer, and you would be very lucky to find someone who would be happy to do this.
One option would be to join an organized tour, but these can be very expensive and you would have to compete with other people for your tour leader's attention (that's why I offer mostly
one-to-one bird photography tuition).
An alternative is to go shooting with a friend who shares the same interest and who is at a similar point in their learning curve. This joint learning approach has a lot to recommend it in the early stages of your development.
An option to be wary of, however, is dragging along friends and family members who do not share your level of interest in bird photography. This can put a strain on your relationships!
In the end, most people who get into serious bird photography tend to go shooting alone. This has the advantage of giving you the freedom to go wherever you want, whenever you want, and gives you the best chance of stalking birds to get close enough to take decent photos.
How to shoot - getting close to birds
Even with super-telephoto lenses, you still need to get pretty close to birds to capture any real detail. Bird photographers use a variety of techniques to achieve this. One of the best known of these is to set up a small hide or blind, in which you can remain hidden, ideally entering and leaving under the cover of darkness or using a system of decoys. Personally, I've never used this approach, partly because I don't have the time it requires, but mainly because I prefer a more 'roving' style of photography.
To date, my main technique has been to visit a suitable location and then to see what photographic opportunities I can find there, returning to the location if possible to build on what I've learned from earlier visits. Whilst at the location, I may typically shoot images of around half a dozen species.
An alternative approach used successfully by some photographers is to focus on a single species and to work exclusively on that until excellent results are obtained. If you have plenty of time to devote to bird photography, this is a very good technique. However, if (like me) your time is limited, this approach may not enable you to make the most of the opportunities available.
To get close to birds, one of my favourite techniques is to use my car as a hide. Birds will often let you get very close to them in a car, even if you're pointing a big lens out of the window! An added benefit is that you can use your car door as a camera support. I often drive with my camera strapped in to my front passenger seat until I'm in position and then slowly raise the camera to the (already open) driver's window. A beanbag can be used to provide support for your lens in this position. You can buy special clamps for this type of shooting, but I've never felt the need to use one of these.
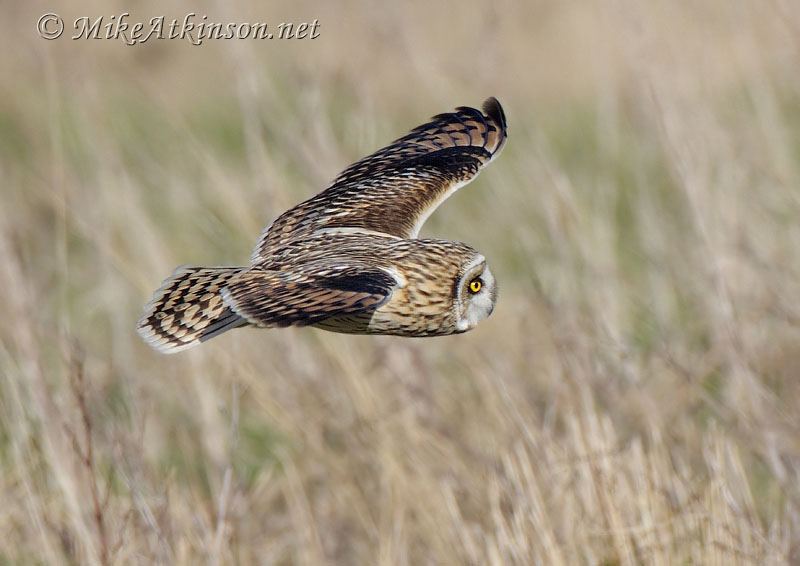
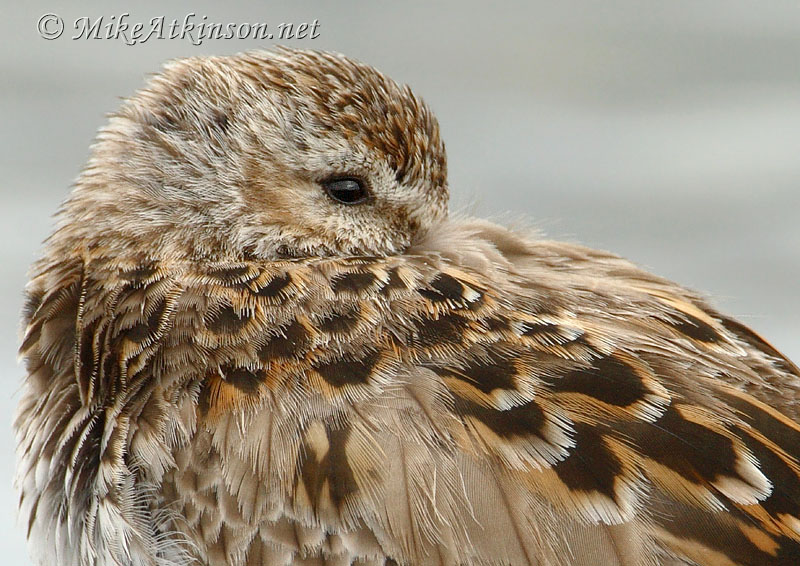
Use you car as a hide There is a well-known spot in North Wales where you can park your car among hunting Short-eared Owls, but from which the owls will disappear as soon as anyone gets out of their car.
If using your car is not practicable, and there are no suitable hides from which you can shoot, you can often get great results simply by walking around and looking for suitable subjects. As with birdwatching, this is where it pays to know your habitats and the species they contain, and to hone your observation (and listening) skills to locate great subjects. You may be photographing Tufted Ducks on your local lake, but would you notice if there was a Scaup feeding amongst them or a Hobby hunting overhead or a Cetti's Warbler singing behind you?
Often, an area can appear completely devoid of birds and yet, if you just settle down and wait for ten minutes, birds seem to appear from all directions.
Again, some photographers go to town on camouflaging themselves and using involved stalking techniques, but you can often make just as close an approach by nonchalantly walking up to a bird. If anything, I find it useful to approach birds at an angle, rather than heading straight for them, and to look away from them as much as possible. Staying low and avoiding sudden movements often makes birds feel less threatened.
As you approach, you should look for signs of discomfort in the bird. All birds have a 'circle of fear' which, if breached, will result in distress and/or flight. For some birds (e.g. breeding, rare or protected birds), you should stay well outside the circle of fear and should back off at the merest hint of discomfort. For more common birds outside the breeding season, though, there is no harm in trying to approach as close as possible by slowly edging forward as the bird's confidence allows.
Take it slow Sitting on a beach close to roosting Dunlins and Ringed Plovers, I found I could edge closer at a rate of around a foot per minute without disturbing the birds. They were so relaxed that they let me approach to within five feet. I'd given up taking photos when I reached the close-focus limit of my lens (14 feet) and just enjoyed the feeling of being part of a wader roost!
Before visiting a location, it's best to spend some time researching what to expect when you get there, including what roads, car parking and footpaths exist, what fixed hides or other viewpoints are present and, of course, what birds you may expect to find there and when. Use the Internet and talk to as many people as possible to build up a picture of what to expect. On arrival at the location, you can often get further information about what's around from other bird photographers who happen to be there, or from wardens or birdwatchers. Be aware, however, that birders - especially those with top quality scopes - may direct you to birds that are far too distant to photograph. I was recently persuaded to travel to a Kentish Plover giving 'amazing views', which turned out to be nearly a mile away!
Finally, if you are interested in locating a specific rarity, it's best to subscribe to bird news/alert services
such as those at BirdGuides. These can give you detailed location information, including grid-reference coordinates, and can provide field updates via your mobile phone. Once at the location, you will often see other birders/photographers returning to their cars who can point you in the right direction. Sometimes, it's obvious where the bird is because you can see the 'huddle' of twitchers and snappers. This can be a very welcome sight, especially if you've travelled some distance in the hope that the bird will still be there.
Use bird news services I would never have photographed a Long-billed Dowitcher if I hadn't seen one reported on BirdGuides.
How to shoot - getting sharp photos
When using the 'roving' approach to bird photography, it's ideal if you can manage to shoot handheld, so that you're not encumbered with a heavy, bulky tripod. If the light level is high enough, this shouldn't be a problem, especially if you have an image-stabilised lens. For duller conditions, a monopod can be a good alternative to a tripod. These can even be left attached in the closed position when shooting handheld, ready to be extended in seconds if more support is needed.
If you don't have a tripod or monopod with you, it's surprising how many alternative means you can find to get additional support in the field. Fence posts, walls, tree stumps or the ground itself can be used to rest your gear on. For hard surfaces such as dry stone walls, it's better if you can use a beanbag under your gear, but even a jumper or coat can be used to good effect as an alternative. A technique I often use is to rest my left hand on whatever support I can find, and then rest my lens on my hand. This gives a good combination of support and control.
Sometimes, though, you will have no choice but to shoot with your camera and lens totally unsupported. In these circumstances, you need to make use of what photographers call 'long lens technique' to get the sharpest possible results. In fact, you can use some of these methods to improve sharpness even if you are using some form of support.
The basic principle of long lens technique is to provide as much bracing of your gear as possible, and to minimize the effects of any 'shake'. For example, if you hold your lens with your left hand at the 'far end', a given amount of movement in your hand will have a proportionally smaller effect than if you hold the lens closer to the camera body, i.e. it will cause the lens to rotate through a smaller angle. Set against this, however, is the fact that it is physically harder to hold a long, heavy lens with an outstretched arm, and so movement is more likely. On balance, the best results are achieved by bracing your left elbow against your body as much as possible, whilst supporting the lens as far away from the camera body as possible.
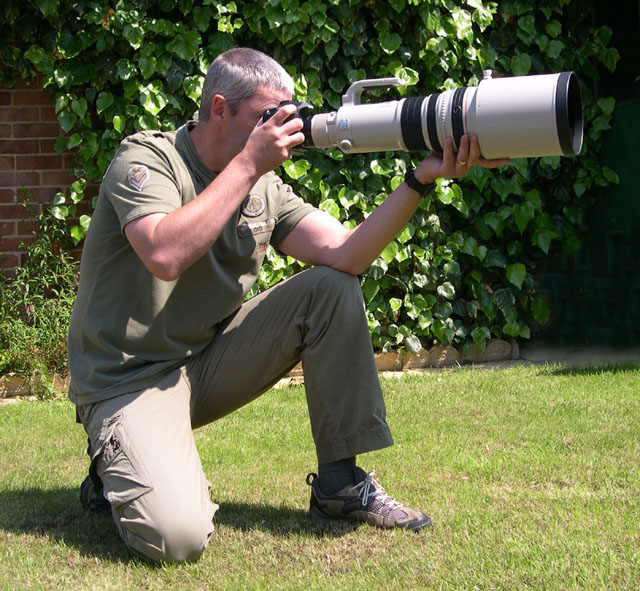
If the situation allows it, better bracing can be obtained by kneeling on your right knee and resting your left elbow on your left knee, with your left foot flat on the ground. A less conventional position is to lie on your back with your left elbow braced against your hip, or even with your lens resting on your raised knees.
Depending on your gear and level of physical strength, these positions may not be necessary but, after shooting with a 500mm f4 lens plus converter for more than an hour or two, I find my arms get tired and extra bracing is needed to prevent excessive shake.
Long lens technique This is one of many positions you can use to provide some support or bracing to reduce 'camera shake'.
In addition to supporting your lens with your left hand, it's also important to brace your camera body using a combination of your right hand and your face. You should ensure your face is pressed against the left side of your camera back and your right hand maintains a firm but relaxed grip on the right side, with your shutter finger able to rest gently on your shutter release.
For the greatest stability, inhale, then half-exhale and pause whilst gently squeezing (not stabbing) the shutter release.
Even with image-stabilised lenses, good use of long lens technique can still be necessary in some circumstances, and will almost always increase your ratio of 'keepers'. Further guidance on support will be given in a future tutorial.
How to shoot - using the light
When preparing to visit a location, pay particular attention to the direction of light you will find when you get there. As mentioned above, the best quality light is normally found within a couple of hours of sunrise and sunset, but the direction is also important.
To start with, I would suggest trying to keep the sun behind you when you shoot. Although this can sometimes give very flat lighting, it gives the fewest problems with exposure and the best colour saturation, enabling you to build up a collection of very pleasant images. By shooting with the light more towards the side, you can get better 'modelling' (a more three-dimensional appearance) of the bird, but problems with brighter highlights and darker shadows can creep in. Shooting towards the light can create wonderfully atmospheric images (including silhouettes), but is best tackled once you have mastered rear and side lighting. Once you're in the field, you can often choose the direction of light falling on the bird(s) you're photographing by moving yourself relative to them, e.g. if you're photographing ducks on a small lake, you can walk round the lake until the sun is behind you.
If possible, try to ensure the sun is visible as a reflection in the bird's eye. This is known as a 'catch-light', and can lead to a much more appealing image. Even on cloudy days, it's possible to get catch-lights from bright areas of sky.
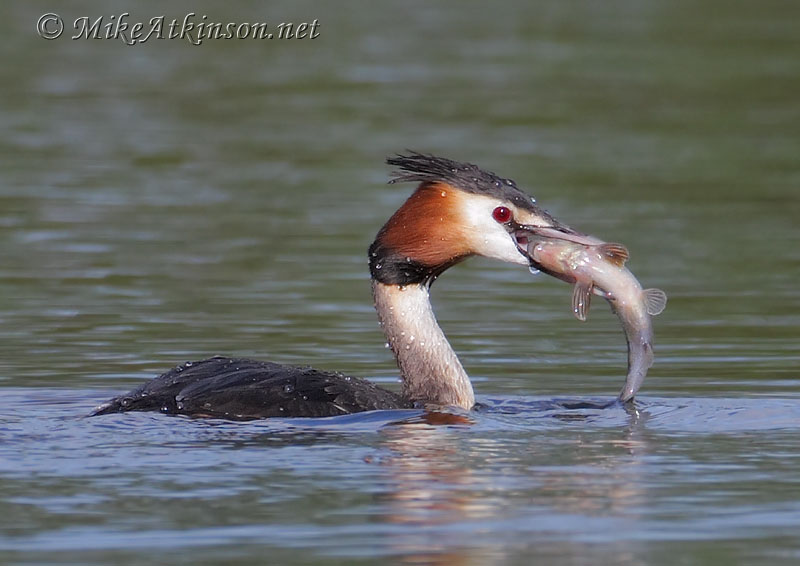
Front lighting By positioning myself on the sun side of where this Great Crested Grebe was fishing, I knew that I would have good light if the action and pose came together.
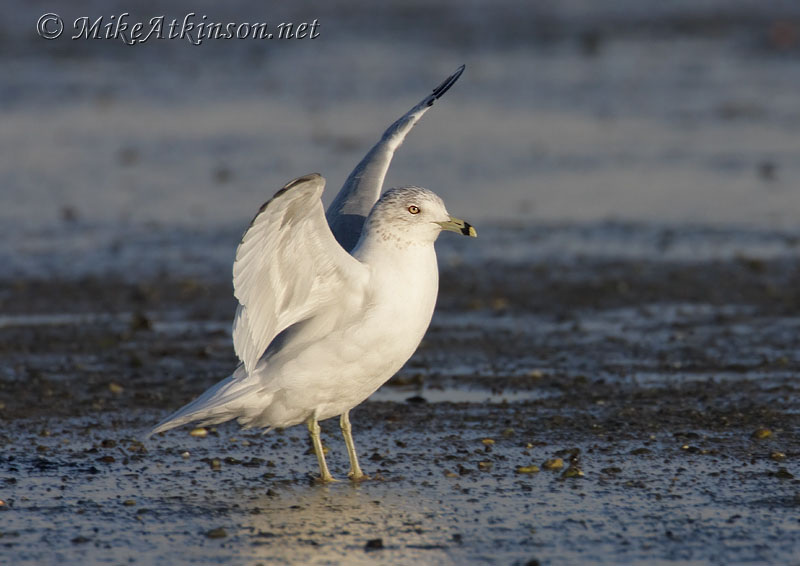
Side lighting When I caught up with this Ring-billed Gull on a mudflat, I didn't have any choice of light direction, but I was happy that the evening light off to one side was bringing out the bird's shape nicely and making it stand out from the background. It was then just a case of waiting until the right moment when it faced the right way and struck the right pose.
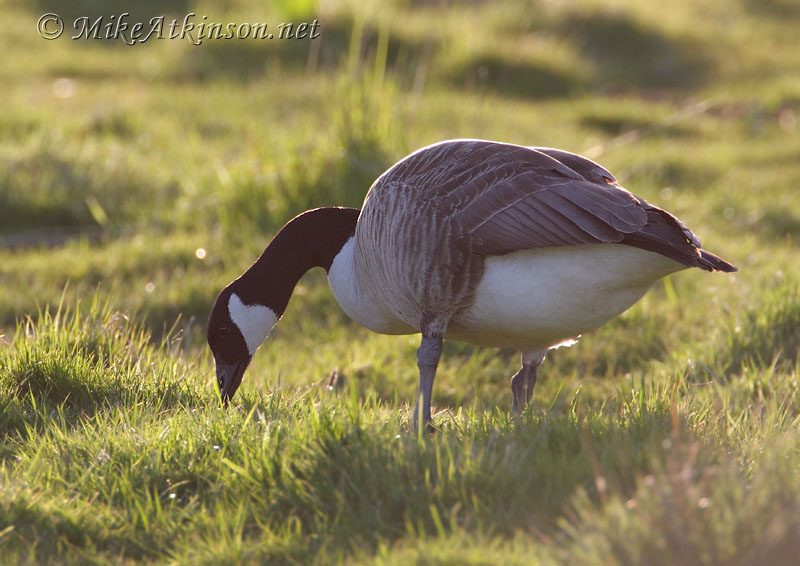
Back lighting Heading back to my car at sunset one day, I noticed the atmospheric scene of Canada Geese grabbing their last food of the day. Shooting directly towards the sun, I managed to capture the rim lighting outlining the bird and some pleasing effects in the backlit grass.
How to shoot - capturing the defining moment
Looking for catch-lights is an example of the finishing touches you can apply to an image once you've got a couple of 'insurance shots' in the bag. Typically, I would grab a few early shots to test exposure levels and to ensure I have at least some images, especially if the bird is uncommon or if I don't have any photographs of that species already. After that, though, I would quickly be looking to get a good angle and composition on the bird in general, and then would concentrate on what the bird itself is doing.
Even for a basic bird portrait shot, with no exciting action in prospect, it's important to try to capture the bird in the best possible pose. The most critical aspect of this is probably the 'head-turn'. The chances are, the bird will be constantly rotating both its body and its head. In fact, good images are normally possible whether the body is facing towards the camera, sideways on or facing away from the camera. However, the angle of the head is much more critical: images with the head facing away from the camera rarely work. Watch the bird intently until it turns at least sideways on to the camera, and preferably towards the camera to some extent. A combination that works particularly well is where the body is angled slightly away from you and the head is angled slightly towards you.
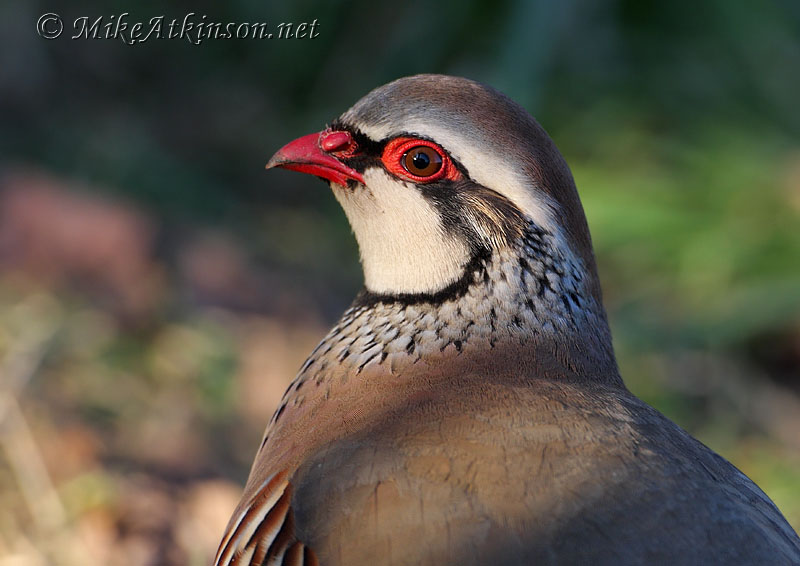
Head-turns and catch-lights Ground-feeding birds such as this Red-legged Partridge spend most of their time with their heads down, pecking busily, but they do periodically raise their heads for a quick look-around. It can be quite a challenge to catch them at just the right moment. I like the dappled light coming through the trees on this shot. I also like the way the head is framed by the black and green background, which is pure luck!
Head-turns and catch-lights I managed to rattle off a dozen or so shots during this close encounter with a Tree Sparrow, but this one is my favourite because of the appealing head-turn and the engaging eye contact.
Concentrating on general pose, head-turns and catch-lights will enable you to get much more engaging images but, to create images with the greatest impact, you need to capture a unique moment in time, which normally means an action-freezing shot. This is where all of your birding and photography skills come together. Knowledge of your target species helps you to predict when action is most likely, e.g. what time of year the birds will be battling for territory or displaying to attract a mate, or what time of day the birds will be hunting or preening. Tuning in to birds' behaviour helps you to spot when something is about to happen, e.g. feeding their young or diving to catch a fish. Familiarity with your camera helps you to set the right exposure without taking your eye off the action. Practised long lens technique ensures your shots aren't ruined by equipment movement. Most of all, though, a finely tuned sense of timing enables you to press the shutter at the precise moment the action reaches its peak.
No matter how well honed your skills, though, taking dramatic images always involves an element of luck. Look through some of the
BirdGuides Photos of the Week and you'll see that many of them capture a unique moment in time. There's no way you could just decide to go out and capture a Sparrowhawk carrying a Snipe, or a Stone-curlew fending off a rabbit. What all of these images have in common, though, is that the photographers were out there in the field putting in the hours. They had the skill and composure to respond to the opportunity presented, but they still had to adhere to the tenet of the best wildlife photographers worldwide: Be There.
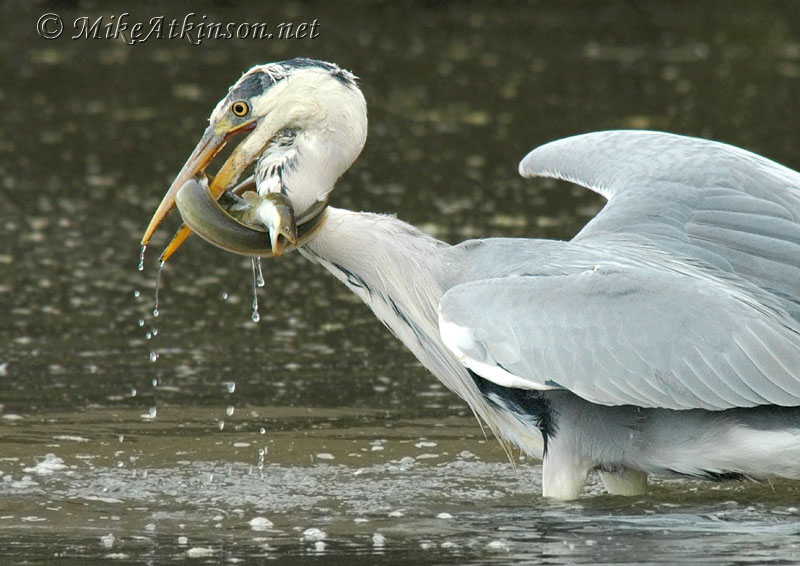
Defining moments This is one of my early bird photos and is not a good image technically. It did, however, capture the peak of the action as a Grey Heron struggled to get the better of an eel. The eel's expression, the dripping water and the heron's menacing pose sum up this life-or-death struggle. I just wish I could shoot the same scene again, but these opportunities don't come round a second time!
If you're interested in getting some assistance with your bird
photography, contact me. I'd be happy to give advice or to sign you up for
one of my Bird Photography Workshops.